
Key takeaways
- Using too little leader: A leader shorter than 12 inches may not provide enough protection around rocks or structure. It can also place the knot too close to the lure, where it may affect presentation.
- Skipping lubrication: Dry fluorocarbon and braid create friction during tightening. Lubricate before cinching to reduce heat and avoid damaging the line.
- Making loose wraps: The FG knot depends on braid pressure gripping the fluorocarbon. Loose, separated wraps can slide under load.
- Overloading the leader: A 25-pound leader does not make a light rod or reel suitable for 25-pound fish. Match the entire setup, including the rod, drag, hooks, and lure.
- Leaving rough tag ends: Long or uneven ends can catch on rod guides. Trim them cleanly after the connection is fully tightened.
- Using damaged line: Frayed braid and nicked fluorocarbon compromise any knot. Cut back to clean line before tying.
- Rushing the first attempts: The FG knot takes practice. Tie several at home before relying on it during a fishing trip.
Learning how to tie fluorocarbon leader to braid is one of the most useful fishing skills you can develop. Braid offers strength, sensitivity, and casting distance, while fluorocarbon is relatively abrasion resistant and less visible underwater. The connection between them, however, is only as reliable as the knot and preparation.
If the knot is tied incorrectly, the leader can slip, the braid can cut into itself, or the connection can fail when a fish makes a hard run. A bulky knot may also catch on the rod guides, reducing casting distance and damaging the connection over time. The steps below focus on the FG knot, a slim and strong option for most spinning and casting setups. A double uni knot is easier for beginners, but it is larger and more likely to catch on guides.
Our top picks
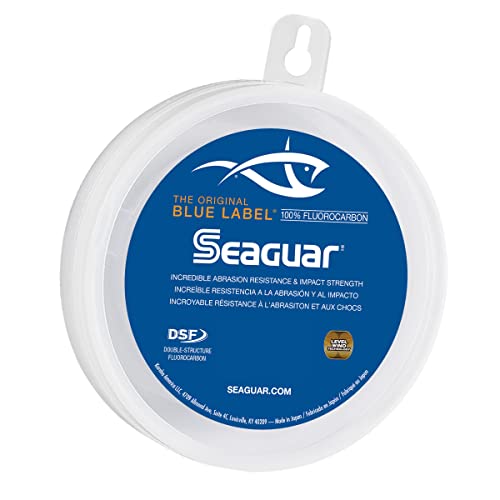
 Seaguar Fluorocarbon Leader 20lb Test 25 Meter
- This double structure 100% fluorocarbon boasts exceptional knot…
- Blue Label Leader Material has a proven track…
- Whether you’re trolling, casting plugs or deep water…
As an Amazon Associate we earn from qualifying purchases at no extra cost to you.
For a practical 2026 setup, pair braid matched to your reel with a fluorocarbon leader suited to the cover and species you fish. Seaguar Fluorocarbon Leader 20lb Test 25 Meter Coil typically costs about $13.99, while Seaguar Blue Label 100% Fluorocarbon Leader (DSF) 50yd 25lb commonly costs about $12.99. Prices can vary by retailer and package size.
What You Need
| Item | Why | Optional? |
|---|---|---|
| Braided fishing line | Your main line. Use the diameter and breaking strength recommended for your reel, rod, and target species. | No |
| Fluorocarbon leader | Provides abrasion resistance and a relatively inconspicuous connection near the lure or hook. Common leader strengths range from 10 to 30 pounds. | No |
| Sharp scissors or braid cutters | Make clean cuts without crushing or fraying the braid. | No |
| Fishing pliers | Help trim the finished knot and handle hooks safely. | Helpful |
| Measuring tape or ruler | Helps you create a consistent leader, usually 18 to 36 inches long. | Yes |
| Line spool or secure anchor point | Keeps tension on the braid while you wrap the leader. | Yes |
| Water or saliva | Lubricates the knot while tightening, reducing friction and heat. | Yes |
Step-by-Step
1. Choose and cut the leader (2 minutes)
Start with a leader that matches the fishing conditions. For clear water and light lures, 10- to 15-pound fluorocarbon may be suitable. Around rocks, docks, brush, or toothy fish, 20- to 30-pound leader provides more abrasion resistance. Do not assume a heavier leader is always better; thick fluorocarbon can reduce lure action and may be more visible in clear water.
Cut 18 to 36 inches of leader. Use about 18 to 24 inches for open water or when you want a compact connection. Use 30 to 36 inches when the fish may rub against cover or when you want more leader between the braid and lure. Tie the lure or terminal tackle on the opposite end after completing the braid connection.
2. Position the lines (1 minute)
Hold the fluorocarbon in your non-dominant hand and leave about 8 to 10 inches of tag end extending beyond your fingers. Keep the braid under steady tension with your other hand, or secure it to a rod guide, line spool, or another stable point.
The braid should cross the fluorocarbon at a shallow angle. Avoid allowing either line to tangle around your fingers. The goal is to create tight, alternating wraps around the fluorocarbon rather than loose loops.
3. Make alternating FG wraps (4 to 6 minutes)
Pinch the fluorocarbon and braid together near the crossing point. Bring the braid over the fluorocarbon, then under it, creating one wrap. Move slightly along the fluorocarbon and make the next wrap from the opposite side. Continue alternating sides for approximately 18 to 22 wraps.
Keep the wraps close together, but do not stack them in a loose, uneven bundle. Each wrap should grip the fluorocarbon independently. If the braid slips while you work, stop and restart rather than trying to repair a messy section.
For a thinner braid, 16 to 18 wraps may be enough. With heavier braid or a slick, stiff fluorocarbon, 20 to 24 wraps can provide additional grip. More wraps are not automatically stronger if they are loose or crossed.
4. Cinch the wraps gradually (2 minutes)
Wet the connection with water or saliva. Pull the standing braid and the fluorocarbon leader in opposite directions using firm, controlled pressure. The braid should tighten around the fluorocarbon and form a neat, compact series of ridges.
Do not jerk the lines or use excessive force while the wraps are still loose. Tighten in stages, checking that the braid has not slipped toward the leader’s end. The finished wrapped section should remain uniform, with no large gaps or overlapping coils.
5. Add finishing half hitches (2 minutes)
With the main connection tight, use the braid tag end to tie two or three half hitches around both the leader and the standing braid. Pull each hitch snug before tying the next one. These hitches hold the wraps in place while you finish the knot.
Next, tie two or three additional half hitches around the standing braid alone. This creates a small braid-only finish and helps prevent the tag end from loosening. Keep the hitches compact and aligned with the main wraps.
6. Trim and test the knot (2 minutes)
Trim the fluorocarbon tag end close to the braid wraps, leaving no sharp nub that could catch a guide. Trim the braid tag end to about 1/8 inch, or leave slightly more if you plan to melt it carefully with a lighter. Never melt fluorocarbon; it can weaken unpredictably and produce fumes.
Before attaching a lure, pull firmly on the leader and braid for 10 to 15 seconds. A good connection should stay compact without sliding, opening, or creating a visible gap. If the knot slips even slightly, cut it off and retie it. Testing now is easier than losing a lure or fish later.
Mistakes to Avoid
- Using too little leader: A leader shorter than 12 inches may not provide enough protection around rocks or structure. It can also place the knot too close to the lure, where it may affect presentation.
- Skipping lubrication: Dry fluorocarbon and braid create friction during tightening. Lubricate before cinching to reduce heat and avoid damaging the line.
- Making loose wraps: The FG knot depends on braid pressure gripping the fluorocarbon. Loose, separated wraps can slide under load.
- Overloading the leader: A 25-pound leader does not make a light rod or reel suitable for 25-pound fish. Match the entire setup, including the rod, drag, hooks, and lure.
- Leaving rough tag ends: Long or uneven ends can catch on rod guides. Trim them cleanly after the connection is fully tightened.
- Using damaged line: Frayed braid and nicked fluorocarbon compromise any knot. Cut back to clean line before tying.
- Rushing the first attempts: The FG knot takes practice. Tie several at home before relying on it during a fishing trip.
How Often
Retie the braid-to-fluorocarbon connection whenever the knot shows abrasion, feels rough, slips during a pull test, or has passed repeatedly through the rod guides. Inspect it after catching a fish that runs into cover, dragging the line across rocks, or fishing around docks and pilings.
For routine open-water fishing, inspect the knot at the start of every trip and after several hours of use. Replace the leader when it becomes cloudy, curled, visibly nicked, or shorter than your preferred working length. If you change lures frequently, check the leader near the terminal knot as well as the FG connection.
When to Call a Pro or Replace
You do not need a professional for an ordinary leader connection, but a local tackle shop or fishing guide can demonstrate the FG knot if you repeatedly experience slipping or breakage. Ask for help when you are using unusually heavy braid, wire-like fluorocarbon, or tackle designed for large saltwater fish.
Replace the entire leader if it has deep cuts, flattened sections, severe memory, or discoloration from heat or chemicals. Replace the braid if it feels fuzzy over a long section, has flattened significantly, or breaks well below its expected strength during a careful test. Line is less expensive than lost tackle and can be critical when fishing near hard cover.
FAQ
What is the best knot for tying fluorocarbon leader to braid?
The FG knot is a strong, slim choice that passes through rod guides more easily than many other connections. It requires practice and consistent tension. The double uni knot is easier to learn, but it creates a larger profile and may be less suitable for long leaders that repeatedly cast through the guides.
How long should a fluorocarbon leader be?
Start with 18 to 36 inches. Use a shorter leader for open water, quick lure changes, or when you want the connection outside the guides. Choose a longer leader when fishing around rocks, vegetation, docks, or other abrasive cover. The best length also depends on your rod length and casting style.
Can braid and fluorocarbon be tied without wetting the knot?
You can, but lubrication is recommended. Water or saliva helps reduce friction as the knot tightens. A dry connection may generate heat and tighten unevenly, especially with heavier fluorocarbon. Always pull the knot tight gradually and inspect it before fishing.
Why does my fluorocarbon leader keep slipping?
Slipping usually results from too few wraps, loose wraps, insufficient tightening, or a mismatch between line diameters. Retie the knot with 18 to 24 neat alternating wraps, maintain tension throughout, lubricate before cinching, and perform a firm pull test before attaching your lure.




Write Your Review
No reviews yet. Be the first to share your experience!