
Key takeaways
- Skipping compatibility checks: “1000-4000” is a size range, not a guarantee that every Shimano reel uses the same roller.
- Mixing up washers and spacers: A thin washer can determine whether the roller spins freely or rubs against the bail arm.
- Over-tightening the screw: Snug is sufficient for most small fasteners; excessive force can damage delicate threads.
- Using household lubricants: Penetrating spray, cooking oil, and heavy automotive grease can attract grit or affect reel materials.
- Ignoring a damaged shaft: A new roller will not run correctly on a bent or deeply grooved shaft.
- Testing with a dirty line: Sand and salt can make a new roller appear defective. Clean or replace contaminated line before judging the repair.
A spinning reel’s line roller guides line from the spool onto the bail while reducing friction and twisting. When the roller seizes, develops a groove, or becomes noisy, line can fray quickly, the bail may feel rough, and casting distance can suffer. A poorly executed repair can be just as troublesome: installing parts in the wrong order may lock the bail, over-tightening can crush a bearing, and losing a tiny washer can create uneven line lay. This guide explains how to replace a spinning reel line roller carefully, using common tools and a reel-specific replacement part. The process is often manageable in 20 to 40 minutes, but always compare the new roller with the reel manufacturer’s schematic before disassembly.
What You Need
| Item | Why | Optional? |
|---|---|---|
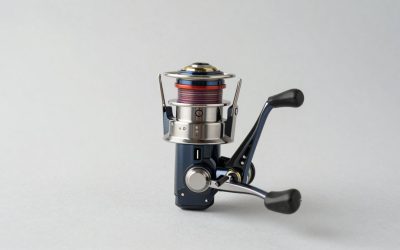
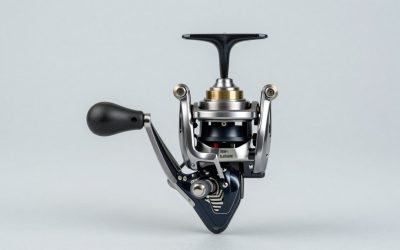
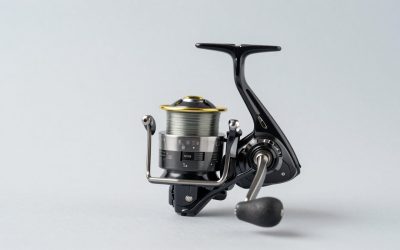
| Replacement line roller assembly | Includes the roller and, depending on the listing, a bearing, bushing, collars, or spacers. A GOMEXUS Titanium Fishing Line Roller for Shimano Spinning Reels 1000-4000 is listed at $13.16. | No |
| Small Phillips and flat-head screwdrivers | Removes the bail-arm screw and separates small retainer parts. Match the driver to the screw head precisely. | No |
| Small tray or magnetic parts dish | Prevents screws, washers, and spacers from rolling away. | Yes, but strongly recommended |
| Clean microfiber cloth | Protects the reel and removes old grease, sand, and salt residue. | No |
| Isopropyl alcohol, 70% or higher | Helps clean old lubricant and grime from the roller shaft and bail arm. | Yes |
| Reel grease and light oil | Grease belongs on the screw threads; one small drop of reel oil may be suitable for a bearing if the manufacturer allows it. | Yes |
| Phone camera or reel schematic | Records the original order and orientation of the parts before removal. | Yes, but useful |
Replacement rollers are not universally interchangeable. The GOMEXUS Titanium Fishing Line Roller for Shimano 1000-4000 Spinning Reels is listed at $13.16, but confirm the exact reel model, generation, bail-arm shape, shaft diameter, and included hardware. Two reels with the same approximate size may use different spacers or screw lengths.
Our top picks


As an Amazon Associate we earn from qualifying purchases at no extra cost to you.
Step-by-Step
1. Confirm the replacement and prepare the reel (5 minutes)
Remove the spool if it blocks access to the bail arm, and set the drag knob and loose parts somewhere clean. Wipe the reel dry. Check that the replacement roller’s width, center opening, collars, and bearing or bushing arrangement resemble the original assembly.
Before taking anything apart, rotate the old roller with your fingertip. A healthy roller should turn smoothly without grinding, side-to-side wobble, or a pronounced groove. Take several close-up photos of both sides of the line roller, including the order of any washers. These photos are especially helpful if the parts are difficult to identify later.
2. Remove the line from the reel (2 to 5 minutes)
Cut away the lure or terminal tackle, then unwind or secure the fishing line. If you are replacing the roller during a broader service and want to keep the line, tie it to the spool or use a line clip so it cannot spring loose. Opening the bail makes the line roller easier to reach and prevents tension on the assembly.
3. Remove the bail-arm screw (3 to 8 minutes)
Locate the small screw or retaining bolt on the bail arm beside the line roller. Press the screwdriver firmly into the fastener and turn slowly counterclockwise. If the screw resists, do not force it immediately; salt or corrosion may be binding the threads. Apply a small amount of penetrating lubricant around the screw head, wait several minutes, and try again while keeping the driver straight.
Place the screw in a parts tray as soon as it comes out. Some reels use a screw with a shoulder, while others use a separate cap or washer. Do not substitute a longer screw, since it can interfere with the roller or internal bail mechanism.
4. Record and remove the old roller parts (3 to 7 minutes)
Slide the roller, bearing or bushing, collars, and washers off the shaft in sequence. Keep the components in the exact order in which they were removed. If a washer remains stuck to the bail arm, leave it in place until you have identified it rather than prying aggressively.
Inspect the shaft and bail-arm mounting surface. Look for corrosion, a bent shaft, damaged threads, or a deep groove where a washer has spun. A replacement roller cannot correct a bent mounting point or badly damaged bail arm.
5. Clean the mounting area (2 to 5 minutes)
Use a dry cloth first, then lightly dampen a cotton swab or cloth with 70% or higher isopropyl alcohol. Clean old grease, line coating, salt, and sand from the shaft. Keep solvent away from the reel’s drag washers, painted surfaces, and rubber seals. Allow everything to dry completely.
Do not polish away metal or enlarge the center opening. The roller should fit the shaft without force but should not rattle noticeably from side to side.
6. Install the new line roller in the correct order (5 to 10 minutes)
Compare the new and old assemblies before installation. Install the parts in the same order as the original unless the replacement’s instructions specify a different arrangement. A typical sequence may include a collar, bearing or bushing, roller, another collar, and a washer, but the exact order varies by reel.
Check the roller’s line-contact surface. It should be centered between the bail-arm supports and aligned so the line runs smoothly across it. If the replacement includes a bearing, make sure its seals or flanges face the same direction as the original. Never hammer or clamp the roller into place.
7. Reinstall and snug the retaining screw (2 to 5 minutes)
Apply only a tiny film of reel grease to the screw threads if appropriate. Start the screw by hand to avoid cross-threading. Tighten it until the parts are secure, then stop. Small reel screws do not need extreme force, and over-tightening can bind the roller, strip the threads, or distort a bearing.
Spin the roller before fully closing your tools. It should rotate freely with minimal side play. If it feels tight, remove the screw slightly and test again. If loosening the screw makes it spin but leaves excessive wobble, a washer, collar, or spacer is probably missing or installed backward.
8. Test the reel under light tension (3 to 5 minutes)
Close and open the bail several times. Turn the handle slowly, then pull a short length of line through the roller with gentle finger tension. The line should travel over the roller without scraping the bail arm. Listen for grinding, clicking, or a repeating tick.
After the first few casts, inspect the line near the roller for fuzzing or a new flat spot. Confirm that the bail closes normally and that the line winds evenly onto the spool. If the roller stops turning after a few minutes, discontinue use and recheck the assembly.
Mistakes to Avoid
- Skipping compatibility checks: “1000-4000” is a size range, not a guarantee that every Shimano reel uses the same roller.
- Mixing up washers and spacers: A thin washer can determine whether the roller spins freely or rubs against the bail arm.
- Over-tightening the screw: Snug is sufficient for most small fasteners; excessive force can damage delicate threads.
- Using household lubricants: Penetrating spray, cooking oil, and heavy automotive grease can attract grit or affect reel materials.
- Ignoring a damaged shaft: A new roller will not run correctly on a bent or deeply grooved shaft.
- Testing with a dirty line: Sand and salt can make a new roller appear defective. Clean or replace contaminated line before judging the repair.
How Often
Inspect the line roller every few fishing trips, especially after surf fishing, muddy shore access, or exposure to saltwater. Rinse the reel’s exterior with gentle fresh water according to the manufacturer’s care instructions, dry it, and check whether the roller turns freely. Do not flood the line-roller area with high-pressure water.
There is no universal replacement interval. Light freshwater use may allow several seasons, while frequent saltwater use can require service much sooner. Replace the roller when it develops a groove, rough rotation, persistent noise, corrosion, or line damage that cleaning and suitable lubrication do not resolve.
When to Call a Pro or Replace
Stop the repair and use a professional reel technician if the screw is stripped, the bail arm is cracked, the shaft is bent, or corrosion has fused the parts together. Professional service is also sensible when the reel has a sealed bearing arrangement you cannot identify, or when the bail spring begins to release during disassembly.
Consider replacing the entire reel if the line roller is only one of several major problems, such as a rough main gear, excessive handle play, damaged drag, cracked body, and severe corrosion. For a relatively inexpensive reel, labor and multiple replacement parts can approach the price of a dependable replacement. For a high-quality reel, a technician may be worthwhile because correct shimming and internal cleaning can restore performance.
FAQ
How do I know the spinning reel line roller is bad?
Hold the roller and rotate it gently. Grinding, sticking, wobbling, visible grooves, or a rough spot during each rotation indicates wear or contamination. Line that repeatedly frays at the bail is another warning sign.
Can I replace only the bearing?
Sometimes. If the roller surface is smooth and the bearing is a separately replaceable part, a bearing-only repair may work. Replace the complete assembly when the roller is grooved, the parts are corroded, or the manufacturer specifies a matched roller and bearing.
Should the line roller spin freely with no resistance?
It should turn smoothly with light finger pressure, but a sealed bearing may have slight drag. It should not grind, bind, wobble excessively, or stop immediately when lightly pulled by fishing line.
Does replacing the line roller stop line twist?
It can reduce twist caused by a seized or rough roller, but it cannot eliminate all line twist. Incorrect lure rotation, closing the bail by turning the handle, and poor line-loading technique can also create twist.
Write Your Review
No reviews yet. Be the first to share your experience!