
Key takeaways
- Using duct tape as a permanent seal: It leaves adhesive residue, peels in heat, and prevents you from checking the gasket.
- Spraying lubricant into the latch: Oil can soften some plastics and attracts sand. Use only a manufacturer-approved lubricant and apply it sparingly.
- Sealing wet tackle: A watertight box can preserve moisture as effectively as it keeps rain out.
- Overfilling the box: A lid that looks closed may not compress the seal evenly.
- Using expanding foam: It can deform the shell and interfere with hinges, trays, and latches.
- Testing with valuable tackle inside: Use tissue first, then a second test before loading hooks and reels.
- Assuming “water-resistant” means submersible: Rain protection and underwater protection are different ratings.
A tackle box does not become waterproof just because it has a tight-looking lid. Water can enter through a warped rim, a damaged gasket, loose hinges, cracked plastic, or an overfilled compartment that prevents the lid from closing evenly. Once inside, moisture can rust hooks, corrode swivels, soften packaging, stain fishing line, and create a musty smell. Saltwater is especially destructive because it leaves behind crystals that continue attacking metal after the box appears dry.
The safest approach is to inspect the box, improve the lid seal, control condensation, and test it before trusting it on a boat or in heavy rain. This guide explains how to waterproof a tackle box without trapping moisture inside or damaging the plastic. If your box is badly cracked or its lid no longer aligns, replacing it with a factory-sealed model may be more reliable than attempting a repair.
Our top picks


As an Amazon Associate we earn from qualifying purchases at no extra cost to you. Ratings are shown as listed on Amazon.
What You Need
| Item | Why | Optional? |
|---|---|---|
| Microfiber cloths | Clean dirt, salt, and moisture without leaving lint around the seal. | No |
| Mild dish soap and warm water | Removes oily residue that can keep a gasket from sealing. | No |
| Soft toothbrush | Scrubs hinge recesses, corners, and the lid channel. | No |
| Replacement gasket or closed-cell adhesive foam tape | Restores compression around a worn or missing seal. | Yes |
| 100% silicone sealant made for plastic | Seals a small, nonstructural crack or fixed seam. | Yes |
| Silicone grease | Conditions a rubber gasket and helps prevent drying or sticking. | Yes |
| Paper towels or tissue | Reveal small leaks during a controlled water test. | No |
| Silica-gel packets | Reduce residual humidity after the box is dry. | Yes |
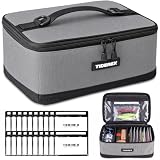
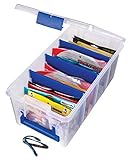
| Waterproof tackle box | A replacement is often the better choice when the shell or closure is damaged. | Yes |
For a replacement, a sealed 3600-size tackle box is a practical option for many anglers. Reference prices for the KastKing HyperSeal Waterproof Tackle Box with 3600 tackle trays range from about $15.99 to $31.99, depending on the listing, configuration, and current sale. Confirm the exterior dimensions and tray count before buying, since a box that is too small may force the lid open.
Step-by-Step
1. Empty and inspect the box (10–15 minutes)
Remove every lure, tray, tool, hook, and packet. Separate anything already wet or rusty so it cannot transfer moisture back into the clean box. Check the lid, base, hinges, latches, tray supports, and corners under bright light.
Look for hairline cracks, cloudy stress marks, bent plastic, missing screws, and a gasket that is flattened, brittle, torn, or pulled out of its channel. Close the empty box and examine the gap around the perimeter. A consistent gap usually indicates proper alignment; a wider section suggests a warped lid or damaged hinge.
Do not attempt to waterproof a box with a split hinge, a badly distorted lid, or a crack that reaches a latch. Those defects can reopen under pressure.
2. Wash away salt and grit (10 minutes, plus drying time)
Mix a small amount of mild dish soap into warm water. Wipe the lid and base, then use a soft toothbrush around the latch, hinge, gasket channel, and tray ledges. Salt crystals and sand can hold the lid slightly open even when the box looks clean.
Rinse the cloth rather than flooding the box. Avoid solvents, bleach, acetone, and abrasive scrub pads; they can cloud plastic, weaken certain polymers, or remove printed markings. Dry all surfaces with a microfiber cloth, then leave the box open for at least 2 hours. If water entered a hinge or narrow channel, allow 12–24 hours in a warm, shaded, ventilated room.
3. Clean and condition the gasket (5–10 minutes)
Wipe the rubber gasket with clean water and let it dry. If it is intact but dry, apply a very thin film of silicone grease using a clean fingertip or cloth. The gasket should look conditioned, not wet or slippery. Excess grease can migrate onto lures and attract grit.
Press the gasket evenly into its channel, starting at one corner and working around the perimeter. Do not stretch it. A stretched gasket may shrink later and leave a gap. If the seal has a flat spot, tear, or permanent deformation, replace it with the manufacturer’s gasket when available.
4. Repair small fixed cracks and improve compression (15–30 minutes, plus cure time)
For a tiny crack in a nonmoving part of the shell, clean and dry the area, then apply a thin bead of 100% silicone sealant designed for plastic. Smooth it with a damp, gloved finger and remove excess before it skins over. Follow the product label, but allow at least 24 hours of cure time before testing. Silicone is not a substitute for repairing a broken hinge or latch.
If the box has no gasket, use thin closed-cell adhesive foam tape only where the lid can compress it evenly. Choose tape approximately 1/16 to 1/8 inch thick, and measure the channel before purchasing. Do not stack multiple layers or place tape across drainage openings, latch mechanisms, or tray supports. Too much thickness can keep the latches from engaging.
5. Dry the contents separately (30 minutes to 24 hours)
Wipe hard lures and tools completely. Lay hooks and metal accessories on a towel in a single layer. Let soft plastics, line spools, and packaging air-dry outside the box. Never seal damp items inside; a gasket can keep humidity trapped for days.
Place one or two silica-gel packets inside a medium box after everything is dry. Use packets labeled for household moisture control, and keep them away from children and pets. Do not rely on uncooked rice: it sheds dust, absorbs limited moisture, and can interfere with latches and small tackle.
6. Perform a tissue test (10 minutes)
Put dry paper towels or tissue inside the empty box, especially along the corners and beneath the lid seal. Close every latch normally. Do not add weight, force, or tape to the lid.
Set the box in a sink or bathtub and pour water over the closed lid for 30 seconds, simulating rain. Do not submerge it unless the manufacturer specifically rates the box for submersion. Open the box and inspect the tissue. Any damp spot identifies a leak area. Dry the box fully, correct the gasket or closure problem, and repeat the test twice.
7. Load it without defeating the seal (5–10 minutes)
Arrange trays so they sit flat and do not press against the lid. Leave roughly 1/4 inch of clearance wherever possible, particularly above bulky lures, pliers, and line cutters. Distribute heavier items across the base instead of placing a dense load on one corner.
Close the lid and check all latches. If one latch requires substantially more force than the others, the box is probably overfilled, misaligned, or damaged. Waterproofing depends on even pressure around the entire perimeter.
Mistakes to Avoid
- Using duct tape as a permanent seal: It leaves adhesive residue, peels in heat, and prevents you from checking the gasket.
- Spraying lubricant into the latch: Oil can soften some plastics and attracts sand. Use only a manufacturer-approved lubricant and apply it sparingly.
- Sealing wet tackle: A watertight box can preserve moisture as effectively as it keeps rain out.
- Overfilling the box: A lid that looks closed may not compress the seal evenly.
- Using expanding foam: It can deform the shell and interfere with hinges, trays, and latches.
- Testing with valuable tackle inside: Use tissue first, then a second test before loading hooks and reels.
- Assuming “water-resistant” means submersible: Rain protection and underwater protection are different ratings.
How Often
Inspect the seal before every trip, especially after fishing in saltwater or transporting the box in a wet boat compartment. Wipe away salt and dirt after each saltwater outing. Wash the exterior whenever grit becomes visible, and condition a healthy rubber gasket about every 3–6 months or according to the manufacturer’s instructions.
Repeat the tissue test every 3 months during regular use, after dropping the box, and whenever you notice wet tackle. Store the box open and empty between trips until all contents are completely dry. Replace silica-gel packets when their indicator changes color or when the package instructions say they are saturated.
When to Call a Pro or Replace
Most tackle boxes are inexpensive enough that professional plastic repair is rarely economical. Replace the box when the lid is warped, the hinge is cracked, the latch will not stay engaged, or a shell crack extends through a corner or mounting point. Also replace it if repeated tissue tests show moisture after a new gasket and careful alignment.
Professional help may make sense for a premium storage case, a custom boat drawer, or a hard case protecting expensive electronics. A plastics or marine-repair specialist can identify the material and use a compatible weld or adhesive. Do not trust a patched box with irreplaceable gear until it passes repeated tests.
FAQ
Can I make any tackle box completely waterproof?
No. You can improve the seal on many boxes, but a box without a designed gasket and secure latches may remain only splash-resistant. Treat a DIY repair as rain protection, not guaranteed submersion protection.
Should I drill drainage holes in a tackle box?
No, not if your goal is waterproofing. Drainage holes may help a ventilated utility box dry faster, but they create direct paths for water. Use an open-air drying period instead.
Is silicone grease the same as silicone sealant?
No. Silicone grease is a lubricant and conditioner for an existing gasket. Silicone sealant cures into a rubbery adhesive used for certain fixed repairs. Never substitute one for the other.
How do I protect hooks from rust inside a sealed box?
Dry hooks completely, avoid storing wet line or lures beside them, and add a fresh silica-gel packet. Check hooks after each trip. If rust has begun, replace compromised hooks rather than sealing them in with dry tackle.





Write Your Review
No reviews yet. Be the first to share your experience!