
Key takeaways
- Do not judge accuracy from a single fish icon. Fish symbols are software interpretations; arches and sonar returns are often more informative.
- Do not mount the transducer behind a strake, chine, rivet line, or trim tab.
- Do not apply maximum sensitivity immediately. Excess gain can turn ordinary water movement into screen clutter.
- Do not confuse water temperature with engine or exhaust heat. A poorly positioned transducer can report an unrepresentative temperature.
- Do not change frequency, range, sensitivity, and noise rejection all at once. Make one adjustment, then observe the result.
- Do not seal a transducer permanently inside the hull unless the transducer and hull material are approved for that installation.
- Do not ignore a weak battery or undersized wiring. Sonar problems can be electrical rather than calibration-related.
A fish finder does not need a complicated “tuning” procedure, but it does need a consistent setup. When calibration is done poorly, depth readings can jump, fish arches can look like weeds, the bottom can disappear at speed, and GPS positions may be off by several yards. Incorrect transducer mounting can also create turbulence, electrical noise, or a false shallow-water reading. Use this 2026 guide to calibrate a new unit, correct unreliable readings, or reset a fish finder after moving it to another boat.
What You Need
| Item | Why | Optional? |
|---|---|---|
| Fish finder and compatible transducer | The display and transducer must match the unit’s sonar frequencies and connector. | No |
| Boat owner’s manual | Menu names, transducer settings, and GPS options vary by brand and model. | No |
| Tape measure or ruler | Measures transducer depth, waterline position, and offset from the boat’s keel. | No |
| Phillips screwdriver, drill, and marine sealant | Used to inspect or correct a transom mount. Seal unused holes to prevent water intrusion. | Only if remounting |
| Clean 12-volt power source | Stable power prevents screen resets, sonar dropouts, and electrical interference. | No |
| Known depth or marked shoreline location | Provides a reference for checking depth and GPS accuracy. | No, but strongly recommended |
| GPS speed reference, such as a phone or handheld GPS | Helps compare the fish finder’s speed reading with an independent reading. | Yes |
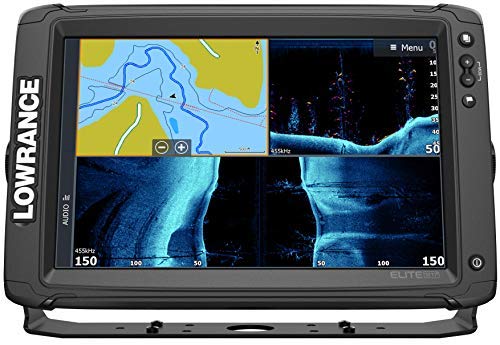
A basic unit such as the Humminbird PiranhaMAX 4 with a dual-beam transducer costs about $139 and is usually calibrated through a small number of sonar and display menus. More advanced equipment, such as an Elite-12 Ti2 with Active Imaging 3-in-1 transducer, wireless networking, and mapping features, can cost about $2,499.99 and requires additional settings for imaging, chart data, and networking. The same core process applies to both.
Our top picks
 Humminbird PiranhaMAX 4 Fish Finder with Transducer
- Product Group: Sports
- Binding: Electronics
As an Amazon Associate we earn from qualifying purchases at no extra cost to you. Ratings are shown as listed on Amazon.
Step-by-Step
-
Inspect the installation and power supply (10–20 minutes)
Turn off the boat’s battery switch and inspect the display cable, fuse, power leads, and transducer cable. Look for crushed wires, loose terminals, corrosion, or sharp bends. A fish finder should receive the voltage specified in its manual, commonly a nominal 12-volt marine supply. Do not power it from an unreliable accessory circuit shared with a trolling motor, bilge pump, or radio if that circuit causes voltage drops.
Confirm that the transducer plug is fully seated and that the unit recognizes the correct transducer type. If the screen asks you to select a transducer, choose the exact model rather than a similar-looking option.
-
Check the transducer’s position (15–30 minutes)
For a transom-mounted transducer, the bottom of the transducer should generally sit flush with or slightly below the hull’s running surface, often about 1/8 to 1/4 inch below it. It must remain in clean, bubble-free water while the boat moves. Keep it away from strakes, rivets, chines, trim tabs, and other features that create turbulence.
The transducer should be level from side to side and aimed straight down for traditional 2D sonar. If it points noticeably forward or backward, depth and fish positions can be misleading. A through-hull or trolling-motor transducer has different installation requirements, so follow its specific mounting instructions.
-
Set the correct measurement units and depth offset (5–10 minutes)
Open the system or installation menu and select feet, meters, or fathoms, as appropriate. Set temperature to Fahrenheit or Celsius and speed to miles per hour, knots, or kilometers per hour.
Next, find the keel, waterline, or depth offset setting. This determines what the displayed depth means. If the transducer is 2 feet below the waterline, enter an offset that makes the unit report depth from the waterline if that is your preferred reference. If you want depth beneath the transducer, set the offset to zero. Write down the choice so you interpret shallow-water readings consistently.
-
Choose the appropriate sonar frequency (5 minutes)
Dual-frequency units commonly offer a lower frequency for deeper water and broader coverage and a higher frequency for improved detail in shallower water. A typical 200-kHz setting works well for many shallow-water situations, while a 50- or 83-kHz option may be useful at greater depths, depending on the transducer.
Start with automatic frequency selection if available. If the bottom is weak or the display is cluttered, test one frequency at a time rather than changing several settings together. On an imaging unit, select the view—traditional sonar, DownScan, SideScan, or a 3-in-1 mode—based on the water depth and what you are trying to see.
-
Establish a clear bottom reading at idle (5–10 minutes)
Take the boat to open water and begin in a known or reasonably calm area. Turn on automatic sensitivity or gain, surface clarity, and depth range. Let the unit display a solid bottom line for at least a minute.
If the bottom is absent, verify that the range is deeper than the water beneath the boat. For example, in 18 feet of water, a 20-foot range leaves little room for changes; a 30- or 40-foot range may be easier to read. Increase sensitivity gradually if the bottom is faint. Reduce it if the screen is filled with continuous colored noise.
-
Test the reading at several speeds (10–15 minutes)
Run slowly first, then test at approximately 5, 10, and 15 miles per hour if safe and appropriate for the boat. The bottom should remain recognizable, though the display may show more interference at higher speed. If the reading disappears only when accelerating, the problem is usually mounting turbulence, not a menu setting.
Adjust the transducer one small step at a time. Lowering it slightly may help it stay in the water, but too much exposure can increase drag or risk impact damage. Never make adjustments while the boat is moving.
-
Calibrate the speed display (5–10 minutes)
Compare the fish finder’s speed with a phone or handheld GPS while traveling in a straight line on calm water. GPS speed can fluctuate, so compare readings over several minutes rather than relying on one instant.
If the unit uses a paddlewheel, clean the wheel and check that it turns freely. Enter the speed calibration factor only after confirming the mechanical sensor is installed correctly. If your unit has no speed sensor, its GPS speed may be accurate enough for general navigation but can differ during turns, under tree cover, or when satellite reception is weak.
-
Check GPS position, heading, and maps (10–15 minutes)
Allow the fish finder to acquire satellites outdoors with a clear view of the sky. Confirm that the position agrees with a known dock, channel marker, or shoreline location. Make sure the chart datum and map region are correct, and update chart data only through the manufacturer’s approved process.
If the unit includes a compass heading sensor, perform its compass-calibration routine away from large speakers, batteries, motors, and ferrous metal. Follow the on-screen pattern, which may require slow circles. A GPS course-over-ground heading is not the same as a magnetic compass heading and may remain inaccurate while the boat is stopped.
-
Save a practical fishing profile (5 minutes)
After the unit reads correctly, save a custom profile with your preferred depth units, range, sensitivity, palette, sonar frequency, and alarms. Keep automatic depth tracking enabled unless you have a specific reason to use a manual range. Set a shallow-water alarm above the boat’s draft, adding a safety margin for waves and an offset between the transducer and keel.
Mistakes to Avoid
- Do not judge accuracy from a single fish icon. Fish symbols are software interpretations; arches and sonar returns are often more informative.
- Do not mount the transducer behind a strake, chine, rivet line, or trim tab.
- Do not apply maximum sensitivity immediately. Excess gain can turn ordinary water movement into screen clutter.
- Do not confuse water temperature with engine or exhaust heat. A poorly positioned transducer can report an unrepresentative temperature.
- Do not change frequency, range, sensitivity, and noise rejection all at once. Make one adjustment, then observe the result.
- Do not seal a transducer permanently inside the hull unless the transducer and hull material are approved for that installation.
- Do not ignore a weak battery or undersized wiring. Sonar problems can be electrical rather than calibration-related.
How Often
Check the transducer, cable, mounting screws, and power connections before every outing. Recheck depth offset whenever you move the transducer, change boats, alter the mounting height, or modify the hull. Run a quick speed comparison at the beginning of each season and after replacing a paddlewheel or GPS antenna. Recalibrate a compass after installing electronics, speakers, batteries, or other magnetic equipment nearby.
When to Call a Pro or Replace
Ask a marine-electronics technician for help if the bottom repeatedly disappears at low speed, the unit reboots, the transducer cannot maintain a reading in clear water, or the boat requires a through-hull installation. Professional help is also sensible when drilling a cored hull, routing cables through a sealed compartment, or integrating multiple networked displays.
Replacement may be more practical when the screen has water intrusion, the connector is corroded beyond repair, the transducer is cracked, or the unit cannot support the transducer’s required frequency. Before replacing anything, test the fish finder with a known-good transducer or have the system bench-tested.
FAQ
How do I know whether my fish finder is calibrated correctly?
In calm water, it should show a stable bottom at idle and retain a usable bottom trace as speed increases. Its depth should match a known reference after accounting for the selected offset, and its GPS position should agree reasonably with a dock, marker, or shoreline.
Should I use automatic or manual sensitivity?
Automatic sensitivity is the best starting point for most anglers. Switch to manual only when you need a consistent presentation or are fine-tuning a specific depth. Make small changes and avoid increasing gain until the display is completely saturated.
Why does depth change when I accelerate?
The transducer is probably entering aerated or turbulent water, or its angle and height are incorrect. Inspect the mounting location first. Menu adjustments rarely fix a transducer that loses clean water flow at speed.
Can I calibrate a fish finder while the boat is on the trailer?
You can set units, offsets, alarms, and many system preferences on the trailer. You cannot reliably calibrate sonar performance, speed, GPS position, or water temperature without launching the boat and testing the system in water.


Write Your Review
No reviews yet. Be the first to share your experience!